
Rebuilt of the Colt
This project needed some planning because we had to think about the parts (the most important ones) we would need to tune the Colt.
OK, let´s start...
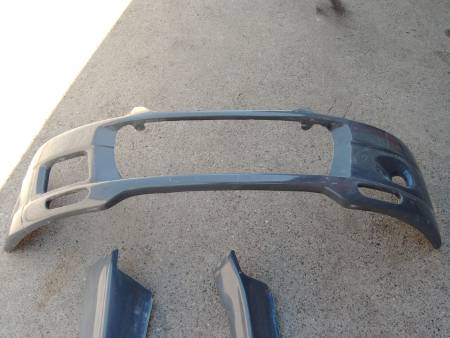
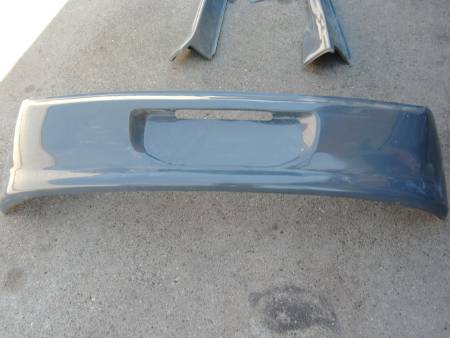
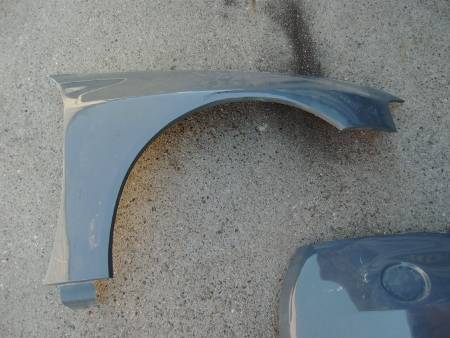
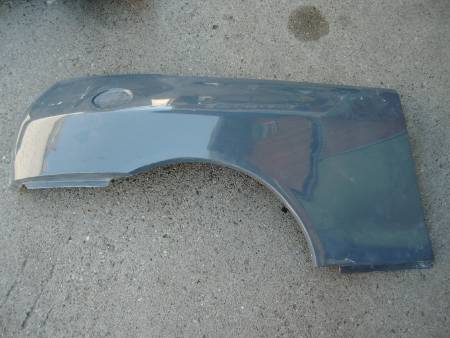
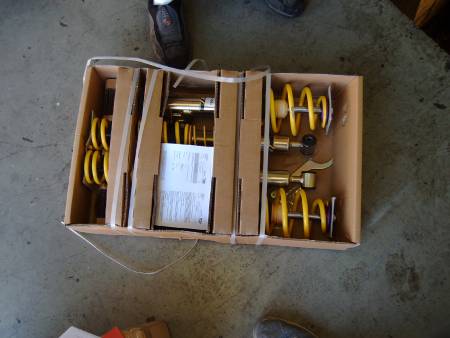
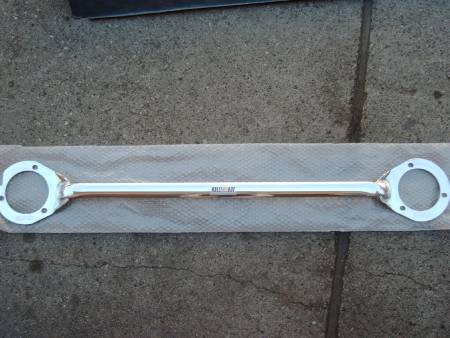
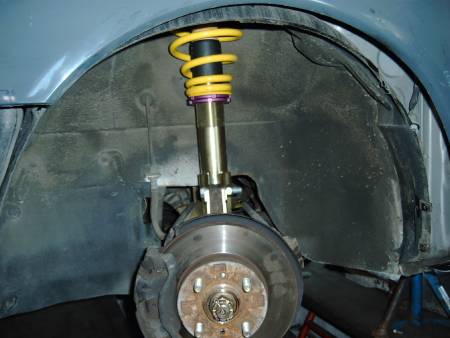
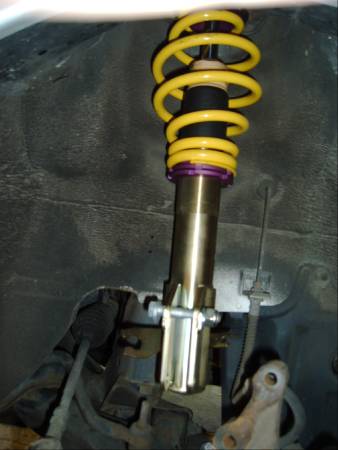
First there´s the bodykit from Ralliart Germany which consists of frontbumper, rearbumper, sideskirts front and rear fenders. Furthermore we take a´n adjustable suspension from KW and a strut brace. The following pics are in the order mentioned above.
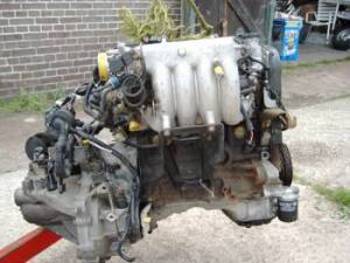
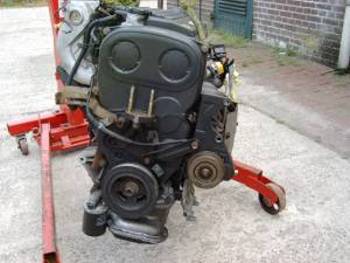
The Colt should not only look faster but it should be faster than the serial Colt. That´s why the Colt needs another engine. It´s an original MIVEC from Japan, taken from a Mitsubishi Colt Cyborg RS. Here are some facts about this engine (taken from a testreport):
Enginetype 4G92
Cubic capacity: 1597cc, 175ps at 7500rpm
Valve train: DOHC 16V with MIVEC (variable valve control)
Compressionratio: 11.0:1
Torque: 17.0kgm at 7000rpm
So that the power is down on the street the Colt gets some Azev A-rims with Toyo-tires. The dimension of the rims is 9x16, ET 15.
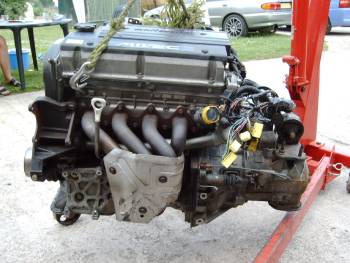
The first thing we did was to change the engine. Serial engine out, MIVEC in, that was the goal. The engine holder and most adapters fit excellent. But with the harness there were the first problems. Because in Japan there´s right-hand drive some cables were to short for the european left-hand drive Colt. And we had to much and to less connectors but with the time we found the solution. We removed radically the MIVEC-harness and used the original one. This saved a lot of our nerves. We had to change the MIVEC-throttle body against the other one because of missing connectors. But the the big moment had come when I turned the key to start the engine. The MIVEC nedded some time for starting but then we heard a enormous sound. OK, there was no exhaust system, only the header... :-)
We changed again the throttly body and tried to use som parts of the MIVEC-harness. To get the connection diagram of the MIVEC-ecu we looked for it worldwide. After a few days calling different people we got one from Mitsubishi Motors Europe which called their collueges in Japan.
A detailed description follows when the enigine is running correctly.
Shit happens. The engine worked only one time because the camshafts got no oil and so they were damaged. But there was an agreement with Coltco.


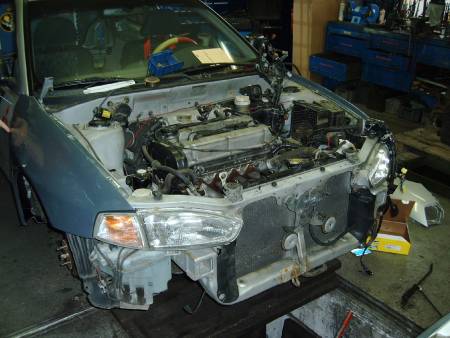
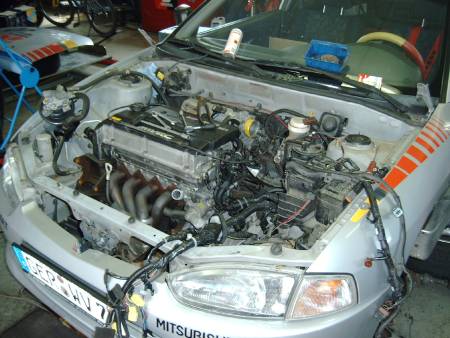
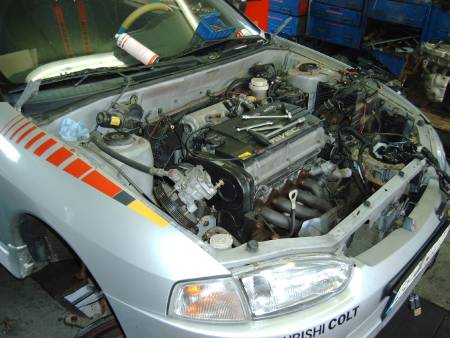
Apropos header. The old engine had a simple flex pipe. For the MIVEC we needed a y-branch pipe. So we had to weld something. But from where we would get a y-branch pipe for the MIVEC? After some calls we had the information the y-branch pipe of the Eclipse (1st generation) fits with the pipe and the bolts of the MIVEC-header. So we provided a used y-branch pipe from the Eclipse and made a new one of the old flex pipe and the used one from the Eclipse.
During thinking about the engine and the harness we started with the installation of the bodykit. The installation auf the front fenders was quite simple. Removing the old ones and installing the new ones.

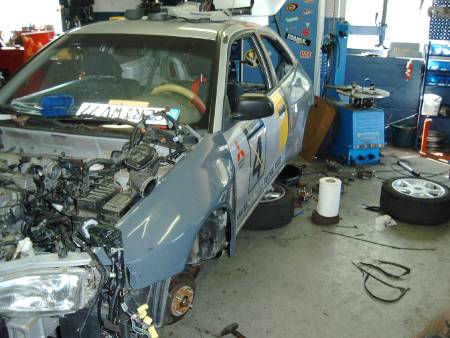
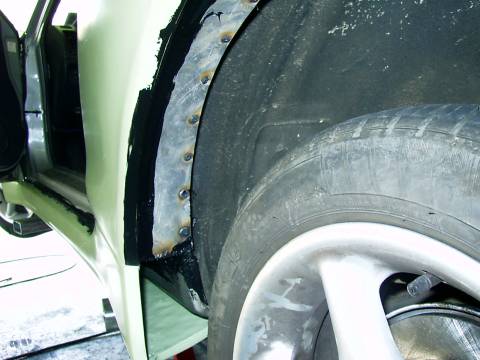
Much more difficult was the installation of the rear fenders. To put these on we had to do some preparations. First we had to remove the glasses. Then we had to flex the wheel arch and turned the metal under that up. The fenders were agglutinated and clenched with the car body.
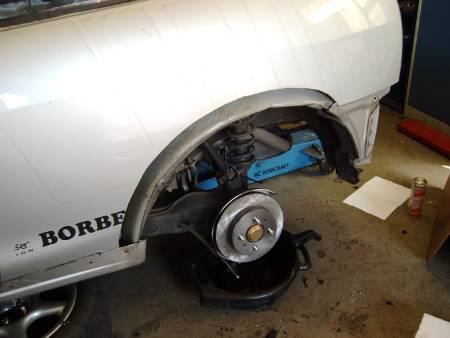


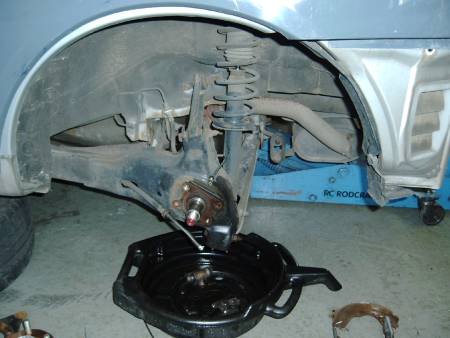
After that we had to install the adjustable suspension. At the front axle it worked quite easy and fast. At the rear axle it was a little bit problematic because one end of the buffer wouldn´t leave the holder. There was a little less room. We used a iron bar to push down the cross member and removed the buffers.
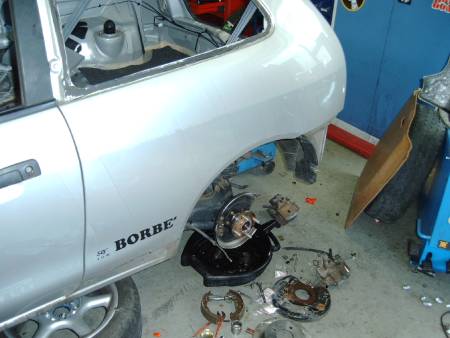
Because of the stronger engine we had to adjust the brakes. We used the brakes from the Colt CA0 GTi. They fit nearly 100%.
The brakes at the front axle were no problem. Removing the old brake caliper intsalling the new one. Perfect!
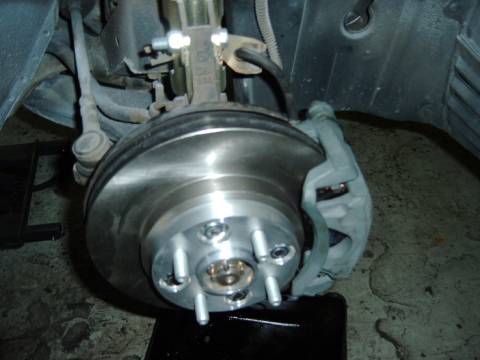 Even the brake-hoses fitted. Nothing had to be
changed.
Even the brake-hoses fitted. Nothing had to be
changed.
At the rear axle we had some doubts whether everything would fit as at the front axle.
First here are the photos, comments will follow.;-)
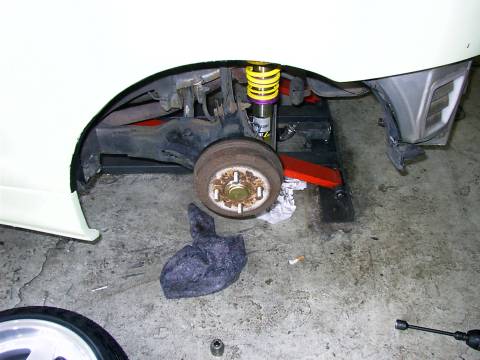


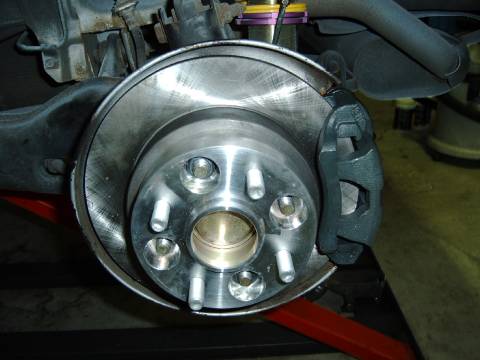
At the first picture you´ll see the drum brake. After removing the cable of the handbrake and the brake-hose you have to remove with the help of a screwdriver the brass-colored metal-cap. It´s right in the middel of the drum brake. Behind that you´ll find a nut. After dismantling the nut you can remove everything. At picture 2 you´ll the the axle without the drum brake. Now you have to screw on the adapter for the brake caliper and the mudguard. The holes to screw on already exist. After that you screw on the flange with the whell bolts. At the right side of the mudguard in picture 3 you see 2 holes. The brake caliper will be screwed on there. On the pictures 4 and 5 you see the final version. At the end of a brake caliper there´s a long screw. When you remove it you can open the brake caliper to put in the brake disc.
So, back to the bodykit... :-)


The instructions from Ralliart to install the bodykit were sometimes a desaster. Most problems we solved with intuition and experience. You can forget the hint "install it at the original attachment point". Nothing fits. So a lot of things had to be adjusted. Another problem was the fuel-neck. Because of the wider body the original one won´t work. The instruction says that the original fuel-neck had to be removed from the car body (damn, that´s right!) and bend it for the new position at the bodykit. OK, after 30 second we knew that this was bullshit. We needed a fuel-neck extension. Two days later we got and installed it.
At the 4 pictures above you see the completion before and after the varnishing. When the Colt came back from the varnisher all removed parts like doors, lights etc. were putted on. The plastic parts in the wheel arches didn´t fit any more because of the wider bodykit. They were too strait. So we drove to the next DIY-store and bought som round tubs. They were easy to adjust (with a knife) and because of the rounding they fit excellent in the wheel arches. At last we putted in the grid in the fornt bumper. That was the exterieur finish of the Colt.
If you have futher questions concerning the bodykit please use the forum or send us an email.